
Timesheet Module Setup
To view the basic steps to setup Alt go to Module Setup page.
Following are the steps to configure Timesheet:
2. Workflow Creation & Mail Template Configuration
3. Required form configuration for Timesheet module menus.
5. Creation of Task List & Task Groups
The above steps are described in detail below:
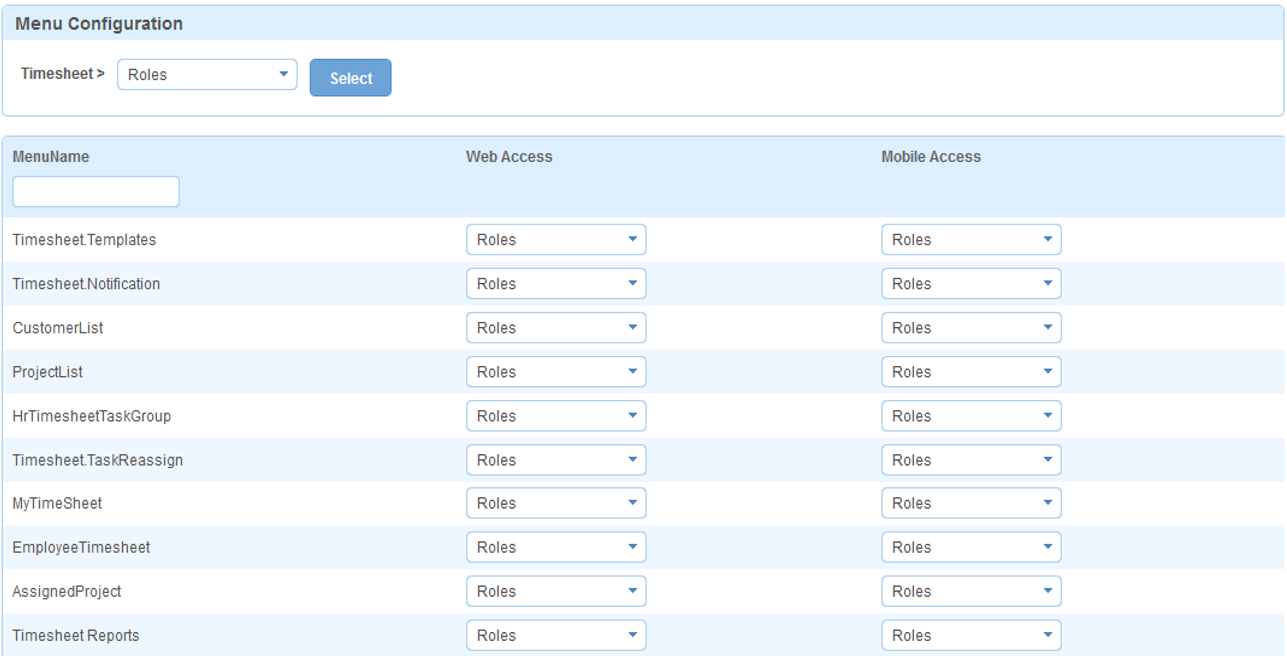
1. Role wise menu assignment
Here, user needs to give required menu permission based on their roles. For this, login to Admin Portal and go to Admin -> Configuration -> Role wise menu permission.
2. Workflow Creation & Mail Template Configuration
For setting up workflow we need to first create the workflow, we can create the workflow by following below mentioned steps:
1. Login to Alt Worklife portal as admin, go to Admin > Configuration > Workflow.
2. Click on + sign to create the workflow.
3. Write the mentioned details:
- Workflow Name: Reimbursement
- Workflow Type: Reimbursement
- Workflow stages setup: mentioned below
I. Initial
II. L1 Approval
III. Rejected
IV. Completed
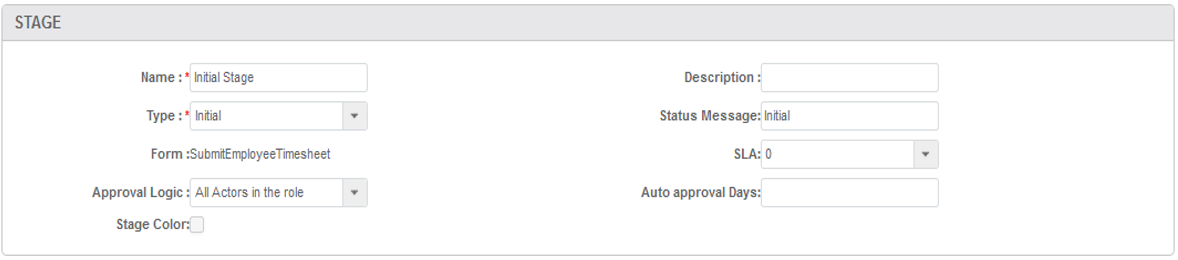
For any new stage setup in workflow, setup four sections:
a. Stage: -
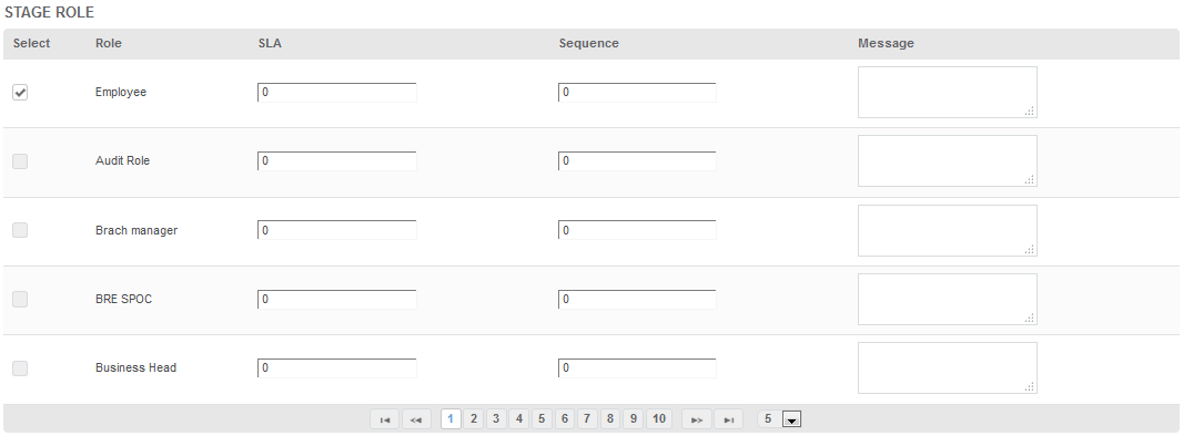
b. Stage Role: -
Define role which would be used on selected stage.
c. SLA Communication:
List of communication templates which are used in this stage.

d. Workflow Stage action:
Here, we define what all actions need to be taken by user. Those all actions need to be created and mapped with
communication temples.

Submit Action:
1. Action Type = Submit
2. Action Name = Submit
3. TransitionType = getdefaultRule
4. Is Visible = True
5. Transitions: here, we define next stage where task will move after acting.

L1 Manager Approval
a) Stage section: All fields are auto filled. These fields can be changed as per requirement
b) Stage Role Section: The roles who have Menu Permission.
c) SLA Communication section: As required, template needs to be mapped with action button.
d) Workflow stage action section: Need to add action buttons (Approve, Reject)
Approve Action:
1. Action Type = Approve
2. Action Name = Approve
3. Transition Type = getDefaultRule
4. Is Visible = True
5. Transitions: To set Transitions you need to add all the stages of the Reimbursement Workflow first.

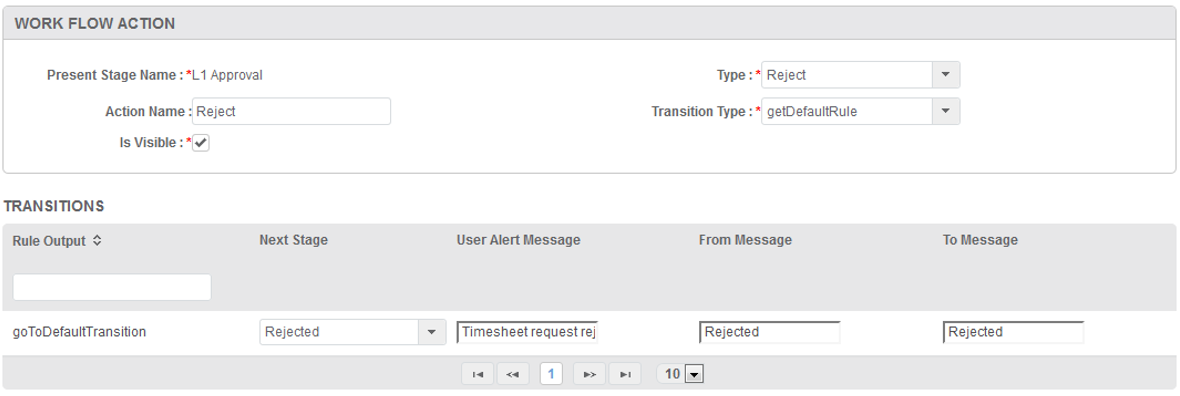
Reject Action:
1. Action Type = Reject
2. Action Name = Reject
3. Transition Type =getDefaultRule
4. Is Visible = True
5. Transitions: To set Transitions you need to add all the stages of the Reimbursement Workflow first.
Rejected
a) Stage section: All fields are auto filled. These fields can be changed as per requirement
b) Stage Role Section: The roles who have Menu Permission.
c) SLA Communication section: Not required in this stage
d) Workflow stage action section: On this rejected stage, user can act (Resubmit).
Resubmit Action:
1. Action Type = Resubmit
2. Action Name = Resubmit
3. Transition Type =getDefaultRule
4. Is Visible = True
5. Transitions: To set Transitions you need to add all the stages of the Reimbursement Workflow first.

Note: Don’t forget to make workflow active otherwise task will not move from one stage to another.
3. Required form configuration for Timesheet module menus.
For all timesheet menus, you need to do form configuration otherwise all forms will be blank. For more details on How to do form configuration, click here.
4. Creation of customers
For creating customer, user needs to login to Alt Worklife portal. After logging into Alt Worklife portal, go to Timesheet -> Configuration -> Customers
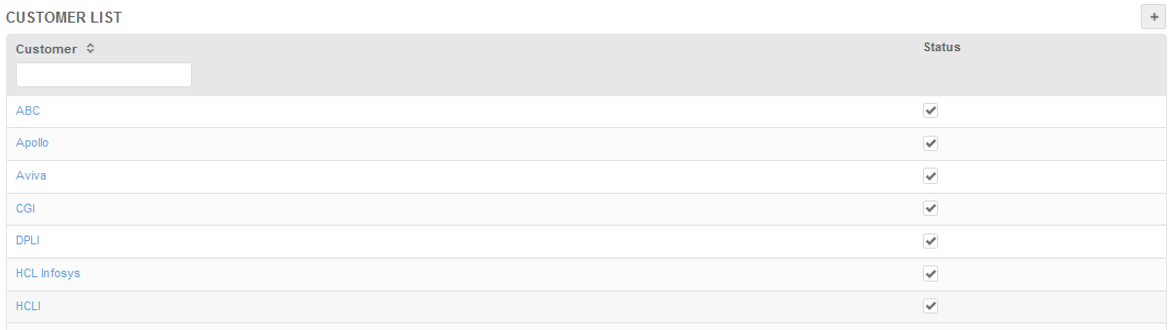
Here, you can view list of customers. Click on (+) to add new Customer in list.

Creation of Cost Center
For creating cost center, user needs to login into Admin Portal.
After login, go to HRIS -> HRIS Master -> Cost Center
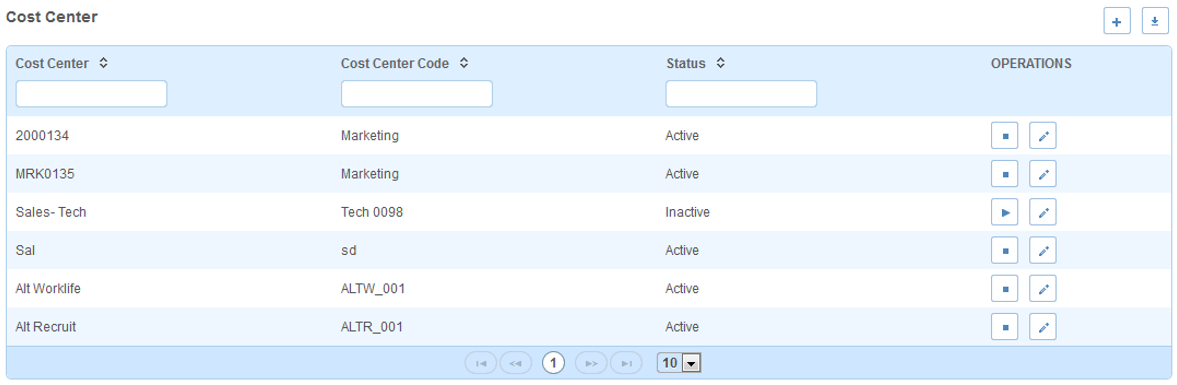
Here, you can see list of cost centers. Click on (+) to add new cost center. And click on  user can download master list of cost center.
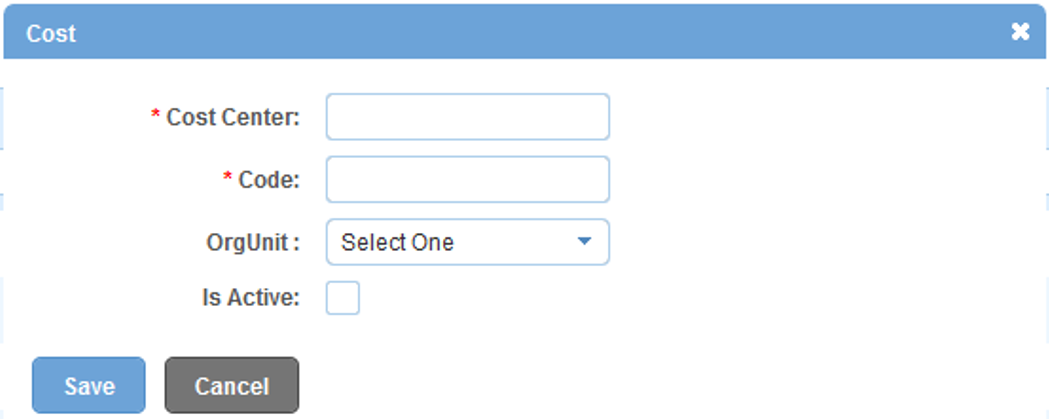
While adding up cost center, selecting Org Unit is not mandatory.
5. Creation of Task List & Task Groups
We need to create task group and then create tasks. After that map tasks with task group. For creating task group and list of tasks, go to Timesheet -> Configuration -> Add task
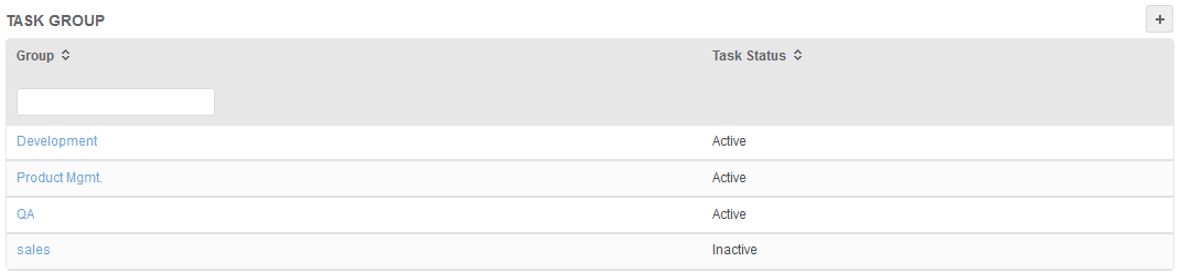
Here, you can view list of customers. Click on (+) to add new Customer in list.

Then we must create task list and map those tasks with Task group.

Here, you can view list of customers. Click on (+) to add new Customer in list.

Here, user has to mention required details and save it.
- Task – Name of task
- Task Status ‚Äì It should be ‚ÄúActive‚Ä? or ‚ÄúInactive‚Ä?.
- Group – Mention group to map task with it.
- Start Date – Task to be shown from
- End Date – Task to be shown till.
6. Creation of Projects
For Timesheet, project needs to be created and then employee must fill their timesheet against assigned projects. For creating projects, go to Timesheet -> Configuration -> Projects

Here, you can view list of projects. Click on (+) to add new Project in list.
Project creation are in three parts:
1. Project Details
2. Team
3. Task
1. Project Details – We add name of project in this section.
Project Name – Mention the name of project
Project Code - Mention the code for the project if any otherwise system will create automatically
Customer – Select name of customer from customer master list.
Cost Center – select cost center from master list.
Project Start Date – Mention the project start date
Project End Date – Mention the project end date.
Project Status Type – Select Status from master list.
2. Team – Here, user can add team who would be part of the project.
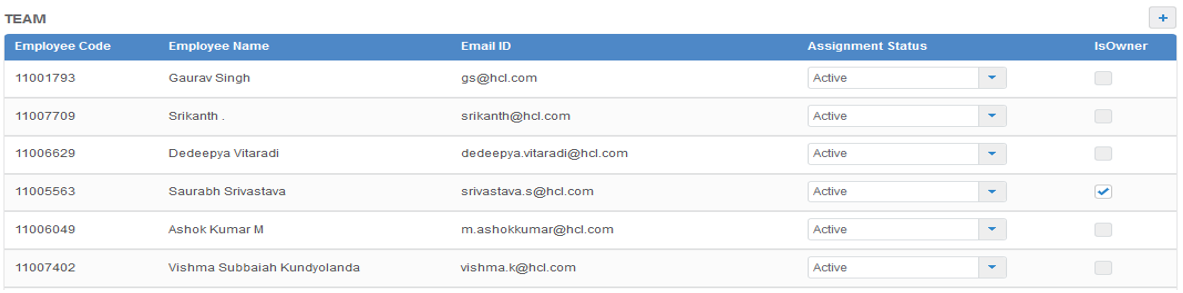
Here, you can view list of teams. Click on (+) to add new team member in list. In team list, Is Owner column is for defining a
person who would be owner for the project. Only owner would be having rights to add or modify team member from their
assigned projects.

while adding new team member in project (in above screenshot), user can select member from their team by using ‚ÄúMy Team‚Ä?
and can select from ‚ÄúAll Employees‚Ä? list.
3. Task – After adding project in project list, user needs to edit to add task for the project.

Here, you can view list of tasks. Click on (+) to add new task in list.

Now, user can add one by one new task for this project or can also select ‚ÄúTask group‚Ä? from list. And after selecting ‚ÄúTask Group‚Ä?, all tasks will get assigned to the project which are mapped with the task group. When user will select ‚ÄúTask Group‚Ä? then all other menus get disabled.